Product Information - Why do we E-Coat our Springs before Powder Coating?
Product Information - Why do we E-coat our springs before powder coating?
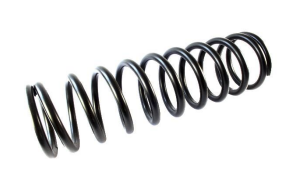
Silicone carbide spring steel is good at absorbing repeated stress, which is why it is used for road springs. However, surface flaws create fatigue points that, when repeatedly stressed, can extend into cracks and cause the spring to fail. What causes fatigue in springs? – almost always rust. If the surface of the spring is exposed to air and moisture, then a rust spot will form, and this creates a fatigue point.
For many years we have been e-coating our springs as well as powder coating them. While this is an expensive process (it adds up to 30% to the cost of a spring) it extends the working life of the spring significantly. An e-coated spring can endure 10,000 hours of continual salt spray in a booth before it will degrade at all.
A bit more about the process follows below.
Electrophoretic Painting Process (E-Coat): Overview of E-Coating
The E-coat process is best described as a cross between plating and painting. It is a process where a metal part is immersed in a water-based solution containing a paint emulsion. An electric voltage is applied to the part causing the paint emulsion to condense onto the part. A part can be painted both inside and out, wherever the liquid can reach a metal surface.
The coating thickness is limited by the applied voltage. As areas of high voltage build a coating, they become insulators thus allowing lower voltage areas to build up. Finally, the interior of a part can be coated since the exterior is fully insulated by the coating. Following the painting tank, a rinse tank removes the residual emulsion from the part and recycles it back to the paint tank by ultrafiltration.
The E-coat is cured by heat and the curing time and temperature is determined by the E-coat chemistry; epoxy, acrylic, etc. The preparation steps for E-coat are identical to plating steps in that the metal surface must be chemically clean.
Typical steps in an E-coat process for metal parts:
1. Cleaning (typically an alkaline cleaner, but substrate dependent)
2. Rinsing
3. Acid etching
4. Rinsing
5. Wetting agent dip
6. E-coat
7. E-coat rinsing and recovery
8. DI Rinsing E-Coating Curing E-Coat Rinsing / Recovery Cleaning Rinsing Acid Etching Rinsing Wetting Rinsing Agent Dip
9. Curing with either convection or infra-red oven (or both) Wetting agent dip.
Curing of E-coat
Since E-coat is essentially liquid paint once it has coated a part, it will require a curing cycle based on the type of paint chemistry being used. As an example, an acrylic-urethane type E-coat will require a curing temperature of 320 F for 20 minutes (metal temperature, specified for Electroclear 2800, product of PPG). As with paints, the energy used to cure the E-coat will depend on the part size and part geometry. Since the E-coat chemistry can be a chemical cross-linking process, the full cure requires both time and temperature to obtain the optimum coating properties.
Final Finishing
After return from the E-coating process, all our springs are powder coated, tested and marked with the individual specifications of each spring. All our springs are tested so that we know they fall within the specifications required. No spring gets to our warehouse that hasn’t passed the tests. You can even use the test results marked on the spring to estimate how many spacers you’ll need to finalise your standing height!