Fitting Instructions - UR13778KT
Fitting Instructions - Part Number UR13778KT-X - For vehicles not currently equipped with a Rear Anti-Roll Bar
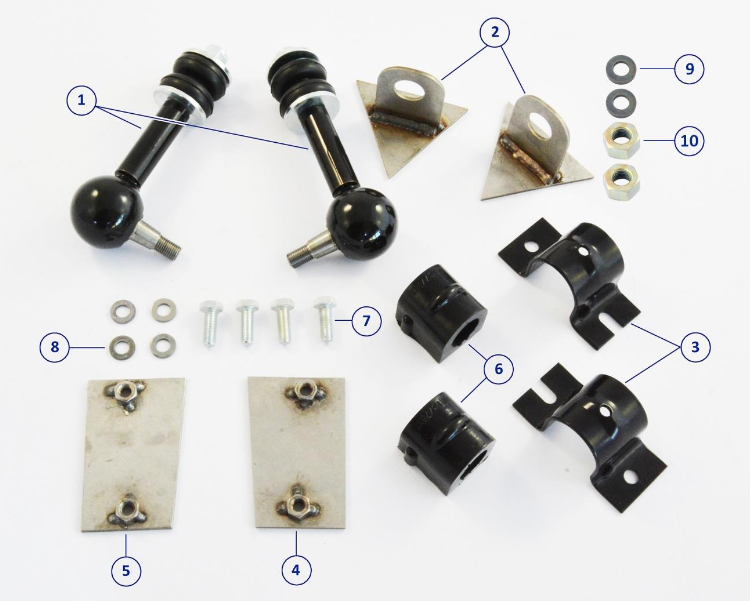
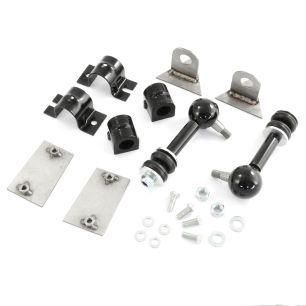
Contents in Kit:
(1) Anti-Roll Bar Drop Link (x2)
(2) Drop Link to Trailing Arm Eyelet (x2)
(3) Bracket, D-Bush (x2)
(4) Weld Bracket, left hand, D-Bush to Rear Subframe
(5) Weld Bracket, right hand, D-Bush to Rear Subframe
(6) D-Bush (polyurethane, x2)
(7) Bolt, D-Bush Bracket to right hand and left hand Weld Brackets (x4)
(8) Washer, D-Bush Bracket Bolt (x4)
(9) Washer, Drop Link to Anti-Roll Bar (x2)
(10) Nut, Drop Link to Anti-Roll Bar (x2)
Stage One – Fitting the D-Bushes to the Rear Subframe
The D-Bush Brackets are fitted first to enable the easy alignment of the Drop Link to Trailing Arm Eyelets.
1) Fit the D-Bushes (6) and D-Bush Brackets (3) to the rear Anti-Roll Bar. If the bush is not split to allow easy fitting onto the bar, you may put a split in the flat base of the bush using a sharp
knife. You will need to adjust the lateral position of the bushes later in the assembly process.
2) Loosely fit the Weld Brackets (4) & (5) to the D-bush brackets, ensuring the wide and is at the bottom, and the captive nuts face towards the Subframe:
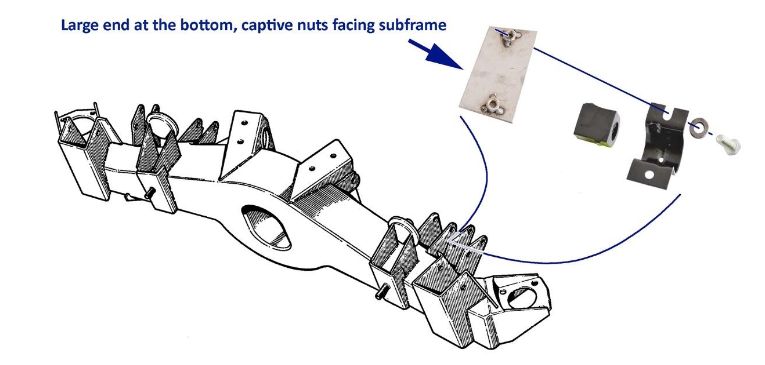
3) Offer up the rear Anti-Roll Bar, D-Bush & Weld Bracket assembly to the Rear Subframe. Slide the Weld Brackets & D-Bushes laterally until they both meet the subframe at the brackets where they may be welded. The Weld Brackets must be positioned vertically so that the Anti-Roll Bar clears the Propellor Shaft. Mark the positions carefully, ensuring that the left hand and right hand Weld Brackets are at the same height.
4) Remove the Weld Brackets from the Anti-Roll Bar and weld into position as marked on the Rear Subframe, making sure the captive nuts are towards the subframe. The Weld Brackets have been manufactured from stainless steel and have been left unpainted to allow welding to take place. Once in position and cooled, we suggest that you paint the brackets with semi-gloss black paint, although this is for cosmetic reasons only as the brackets will not rust.
5) Assemble the Rear Anti-Roll Bar to the Rear Subframe with D-Bushes using the bolts and washers provided.
Stage Two – Fitting the Rear Drop Links to the Trailing Arms
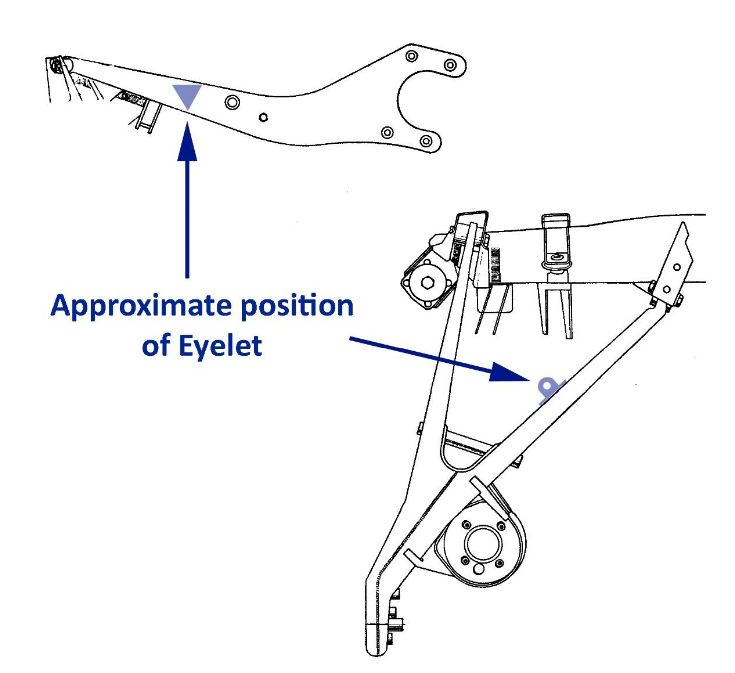
With the Anti-Roll Bar assembled to the Rear Subframe, the bar may be pivoted so that you can position the Drop Link to Trailing Arm Eyelets (2) on the Trailing Arm.
The Anti-Roll Bar Drop Links (1) are provided with rubber bushes, special washers and Nyloc nuts, and must be fitted in this configuration:
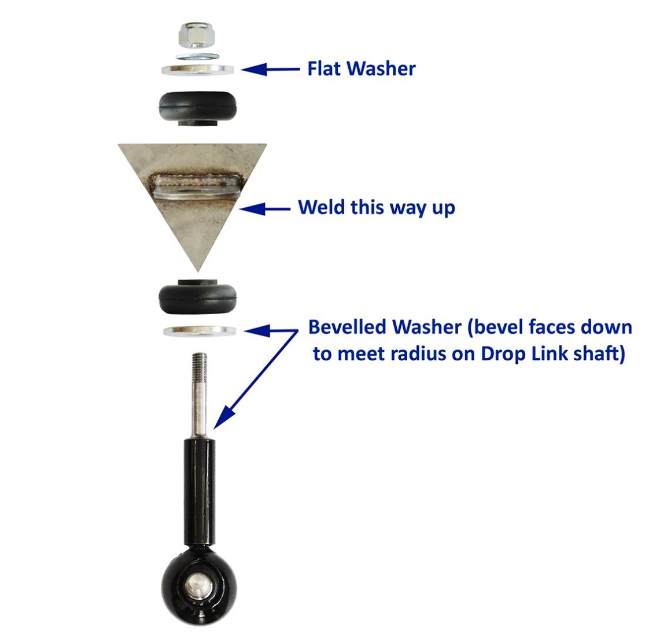
6) Loosely assemble the Drop Links and Eyelets (see. Fig. 3).
7) Loosely attach the Drop Links and Eyelet assembly to each end of the Anti-Roll Bar.
8) Pivot the Anti-Roll Bar until the Eyelet is positioned on the Trailing Arm, making sure that the vertical and horizontal position is the same on both sides. Mark around the triangular Eyelet plate on both sides.
9) Weld Eyelets into position. Once cooled paint with black semi-gloss paint.
10) Fit the Drop Links and Anti-Roll Bar assembly to the Eyelets, taking care to note the configuration illustrated in Fig. 3. Tighten all nuts and bolts securely.
The job is complete! Enjoy a car with more positive handling and reduced roll around corners!