Fitting Instructions - PM20771PC
Fitting Instructions - Part Number PM20771PC
Installation
1) Disconnect the negative (-) or black pole of the battery.
2) Remove and discard the top fixings. You will use the original style crown nut supplied:

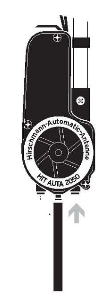
3) Fit the drain tube to the bottom of the motor housing:
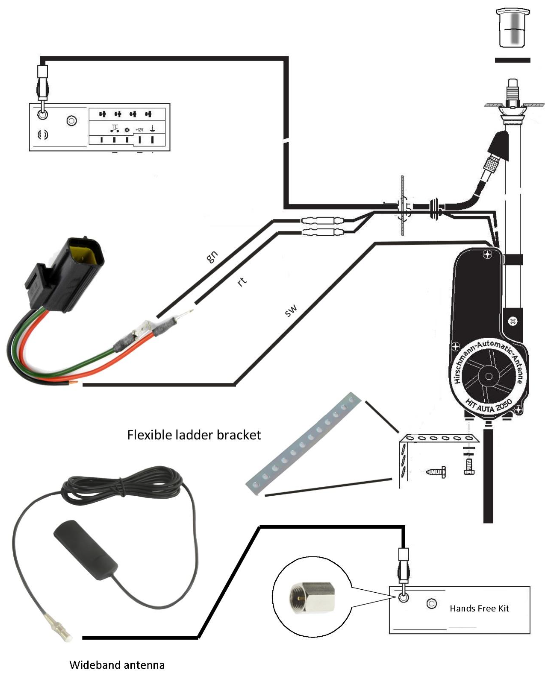
4) Fit the aerial cable to the aerial shaft:
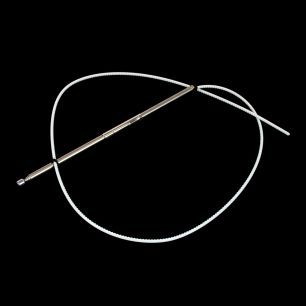
5) Slide the antenna mast through the hole in the wing/fender from underneath.
6) Inspect the original aerial to body seal and re-fit if in good condition. Replace the seal if perished to prevent water ingress. Loosely fit the supplied original-style crown nut:
7) Using the flexible ladder bracket supplied (see diagram, page 1), loosely secure the base of the aerial.
8) Drive out the antenna to check the inclination of the mast. To do so, connect the red and green cable to the positive(+) side of the battery, and the black cable to the negative(-) side of the battery.
9) Adjust the aerial so that the antenna is at the desired inclination and direction, then tighten the crown nut. Lastly, adjust the ladder bracket and tighten so that the aerial is clamped in position, and the crown nut pinches the seal.
Connecting the Cables: PM20771PC-X comes supplied with a handy connector loom and fixings to enable you to connect the aerial easily to the car's wiring:
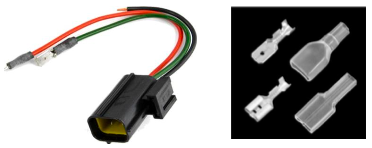
10) Using the connectors provided, connect the red, green and black aerial cables to the corresponding coloured wires on the supplied loom (red-red, green-green, black-black). See first image for the wiring diagram. Now connect the female plug on the loom to the original male plug on the car.
11) Reconnect the battery.
12) The antenna should extend when the radio is switched on and retract when the radio is switched off.
Fitting the Wideband Antenna
The wideband antenna has a self-adhesive backing and 2.5m cable to facilitate fitting in a convenient location. It operates with any existing Hands-Free kit in the vehicle, enabling improved upload/download speeds while on the move. The wideband antenna is a subsidiary aerial for receiving and transmitting across frequencies of 698 MHz to 2700 MHz.
13) Select a suitable location for the antenna that is discreet and allows you to route the cable to the Hands-Free kit. The antenna should be mounted on a non-metallic surface.
14) Connect the wideband antenna cable to the mating port (see first image) in the handsfree kit.
15) Connect your device (laptop/tablet, etc.) to the Hands-Free kit via bluetooth as normal.
Maintenance
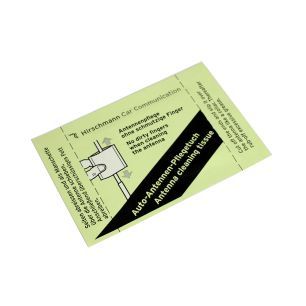
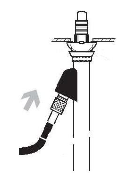
Aerials usually fail because of dirt or foreign matter collecting on the antenna. We recommend the use of aerial wipes AUTA135-X periodically (at least every six months for cars used infrequently, or after every wash if you use your Rolls-Royce or Bentley often). The wipes both clean and lubricate the antenna, removing unnecessary friction during operation and preventing strain on the motor.
Wipes are available under part number AUTA135-X.
Do not operate the aerial or radio if the mast is bent or damaged. Prestige Parts aerials are equipped with replaceable masts, saving you the trouble and expense of replacing the entire aerial in case of damage. The mast is available under part number 820764011-X.