
Accumulator Spheres for Rolls-Royce Silver Shadow & Bentley T Series: Technical Exploration
Matt from IntroCar offers a focused examination of Accumulator Spheres for the Rolls-Royce Silver Shadow & Bentley T series models, backed by an accompanying video.
Component Dissection
In our detailed video, we disassemble an Accumulator Sphere for the Rolls-Royce Silver Shadow II to highlight its internal workings and common repair challenges.
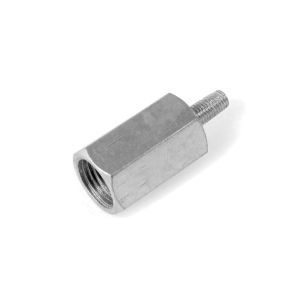
- Silver Shadow II Accumulator Sphere (RH2390): Featuring a shallow top and an extended Charging Nut.
- Main Body Configuration: Composed of three sections, the top integrates via a Locking Ring.
- Diaphragm & Pressure: Positioned in the lower half, it's connected to the Valve Body. When charged, it extends, and the chamber fills with Nitrogen gas. As hydraulic pressure is introduced, the reserve pressure is generated.
Reconditioning Insights
- Locking Mechanism: Original tools with four dowels engage with the Locking Ring to release it. Ensure threads are pristine during reassembly.
- Pressure Dynamics: The Nitrogen gas chamber and hydraulic pressure interaction drive the reserve pressure system.
- Valve Assembly: A switch from a steel ball bearing to a Nylon Ball offers improved sealing. Only use a mild steel drift for seating.
- Kit Components (RH2619): Includes the Diaphragm, a large O-ring for the base, two O-rings for the charging cap, and two Nylon Balls.
Assembly & Further Notes
- Valve and Ball: The Nylon Ball sits in the Valve, followed by a Spring, Cap, and Circlip.
- O-ring Variations: Different types of O-rings are present in the kit to suit specific configurations.
- Protective Measures: A protective Cap for the threads is essential, safeguarding against potential damage during assembly.
For an in-depth visual guide, refer to Matt's technical video.
For those aiming to maintain or repair their vehicles, source the mentioned parts directly from IntroCar. With Prestige Parts®, you are assured of superior quality, keeping your luxury vehicles at peak performance.
Summary
This guide provides a detailed look at Accumulator Spheres for Rolls-Royce and Bentley models. Along with the accompanying video, learn about component assembly and function.
Parts & Availability
| Part Number | Description | Application | Price | Availability | Link |
| RH2390NF | Brake Accumulator Sphere | All Silver Shadow and Bentley T models | £185.50 | Available | Buy Now |
| RH2619 | Accumulator Kit | Rolls-Royce Silver Shadow, Silver Shadow II & Silver Wraith II, Corniche, Bentley T1 & T2 | £69.95 | Available | Buy Now |
| UE36704 | Diaphragm | Bentley Corniche, T Coachbuilt, T Saloon, and T2 Saloon. Rolls-Royce Camargue, Corniche, Phantom, Silver Shadow Coachbuilt, Silver Shadow Saloon, Silver Shadow II Saloon, and Silver Wraith II. | £53.50 | Available | Buy Now |
| UE37239 | Accumulator Valve Cap | Bentley Corniche, T Saloon, and T2 Saloon. Rolls-Royce Camargue, Corniche, Phantom, Silver Shadow Saloon, Silver Shadow II Saloon, Silver Spirit, Silver Spur, and Silver Wraith II. | £50.70 | Available | Buy Now |
.jpg)


Accumulator Spheres & Components (chassis numbers 30000-41648): Exploded Diagram

Full Video Transcript
Welcome back to Part 3 of our mini series of videos on Valve Bodies and Accumulators.
Here I have laid out all the components of a complete sphere. This is the Silver Shadow II Accumulator Sphere (RH2390) with this slightly shallower top and a longer Charging Nut. You can see all the associated components and how they fit together here: Accumulator Spheres & Components chassis numbers 30000-41648.
As you can see, the main body is in three parts, this sits on top like that with the Locking Ring... it screws down and that goes very tight. Usually to get those off what you have to do is, when it's on the sphere, you have to hit it to break it from being seized and then you use a tool. The original tool sits over the top of this ring with four little dowels that are located in these holes and then you clamp it down and have a big bar, usually a scaffolding poll or something like that to undo it. Obviously you have got to make sure the threads are nice and clean when it goes back together.
The Diaphragm sits in the lower half like this & that is the side that is connected to the Valve Body so where the brake pressure builds up. When this top is put on and it's charged with the pressure that Diaphragm will obviously be pushed all the way out and this whole area will be full of Nitrogen gas. As the hydraulic pressure then is pumped into this side it will come back and that is where you get your build up of pressure, the reserve of pressure. This end has a Valve & there is a Nylon Ball.. they used to put a steel ball bearing in there but it turns out that the Nylon Ball seals better so there is now a Nylon Ball that sits in there. You should re-seat that with the steel ball and when you do, if you are doing this, do not use a punch to hit the ball bearing down with because it will be a hardened steel punch and because the ball bearing is hardened steel it breaks the punch and a bit can fly off inside that hole. It will break your punch no matter which kind of punch you are using. Use a mild steel drift if you are seating that valve there.
Then you have the Nylon Ball, a Spring, a Cap and a Circlip go in there which is how it stays in. Then once it is together that gets screwed down, you charge this with the gas, which is sealed internally, and then you have the O-ring. You get two O-rings in the kit for the two different types of top. This is the later top here, the early ones have a slight taper on them and a recess cut out in the cap. This has got a flat cap inside. The small O-ring goes in there & the other Nylon Ball goes in there. You have got your Locking Washer that holds the Warning Plate in place. It does not clamp tight but it stops it from spinning around. Then the Cap goes on and that's like a double seal. So, that is how it is charged up!
In the kit you get the Diaphragm, the big O-ring which goes in the bottom, big O-ring seals in there, which you also get in the Valve Body kit, you get the two O-rings for the charging cap and you get 2 Nylon Balls. The kit is part number RH2619.
The Warning Plate and the Locking Ring are additional and we also have the protective Cap for the threads to protect them from damage because if they do get damaged they are not going to screw in nicely to the Valve Body. That is pretty much it for Accumulators but you are welcome to post any questions that you want to know & I will try answer them."
.jpg)


