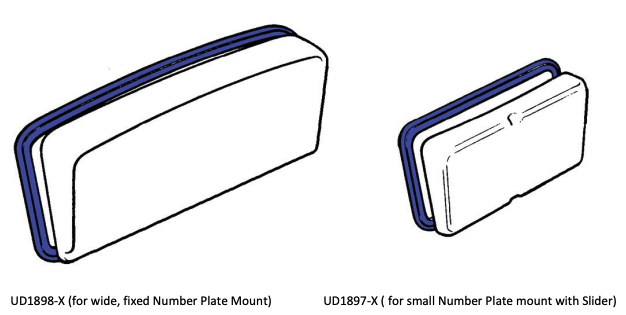
Fitting Instructions - Number Plate Mounting Seals UD1897-X & UD1898-X
Fitting Instructions - Number Plate Mounting Seals UD1897-X & UD1898-X
We’ve never been particularly happy with the factory Boot/Trunk Lid gas struts, which provide very little assistance. Now we have designed our own version, which combines a self-lifting actuation to the fully open position with a smooth, slow operation. These enable the lid to be fully opened either by operating the button on the lid, or the switch inside the car.
Whichever struts you are fitting, you may find they are tricky to fit, so here are some guidelines to help you.
You will need:
• Masking tape
• Marker pen
• White or methylated spirit
• Fine sandpaper
• Double-sided acrylic adhesive tape (3M tape ref. 5952 VHB recommended)
Fitting Instructions
1) Ensure the number plate mount is clean and free of dirt and grease.
2) Clean the seal with white or methylated spirit to remove any residue of lubricant which is present when the seal is manufactured. You can also lightly sand the part of the seal that adheres to the number plate mounting to promote adhesion (see page 2).
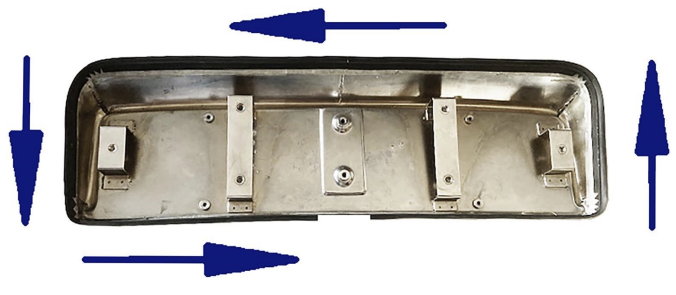
3) The seal is fixed to the number plate mount with double-sided adhesive tape in the orientation illustrated below:
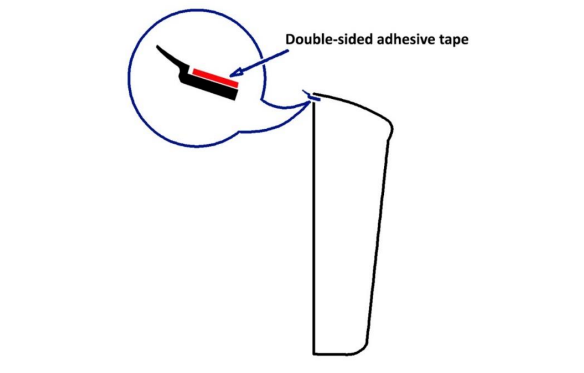
When the number plate mounting is tightened, the visible flap of the seal will follow the profile of the boot/trunk lid. Please note: a gap is left at the along the bottom of the number plate mount to allow for the egress of any water that may accumulate.
4) Place a soft cloth on your bench to protect the number plate mounting and place the mounting face down.
5) Fit the adhesive tape (leaving backing tape on) around the inside edge of the number plate mounting.
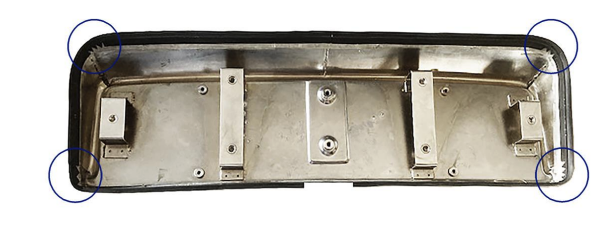
6) Starting from the bottom, place the seal onto the number plate mounting, aligning the segmental cut-outs with the bottom corner (fixed wide type mount illustrated below). Use the marker pen to mark on the inside of the number plate where the seal should begin, leaving a small gap in the centre for egress of any water or condensation that might gather as illustrated below.
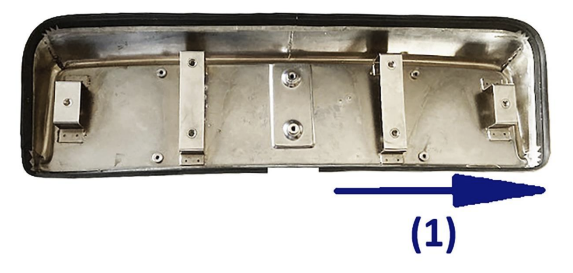
7) Remove the backing tape from the bottom section of seal you have measured, including the first bottom corner. Fit the seal into its permanent position.
8) Repeat in sequence along the other three sides and trim the seal so that the gap is even at the bottom of the mounting plate.
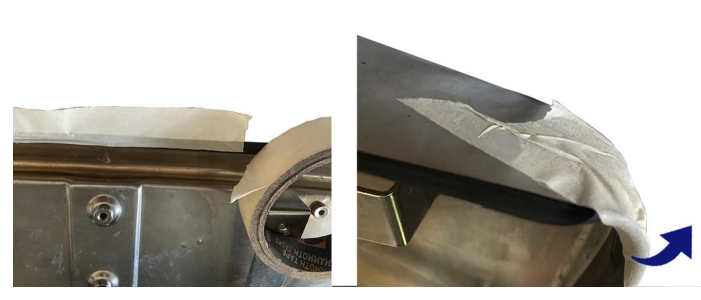
9) At this point we suggest that you use masking tape to fold the seal, temporarily sticking the portion of the seal that will be visible onto the chromed face of the number plate mount as illustrated on page 3. This will allow you to fit the number plate mount without the visible section of the seal becoming caught between the mount and boot/trunk lid.
10) Fit the number plate mounting loosely to the boot/trunk lid. Leave enough space between the mounting plate and boot/trunk lid to allow the masking tape to be removed.
11) Remove the masking tape and check that the seal has not become caught under the number plate mount
12) Tighten the number plate mounting screws and clean any finger marks from the chrome.