Fitting Instructions - Handling Kit for Rolls-Royce Silver Cloud I-III and Bentley S1-3
Fitting Instructions - Rolls-Royce Silver Cloud I-III and Bentley S1-3 Handling Kit
Anti-roll bars work by providing a countervailing force to that produced when cornering causes the weight of a vehicle to transfer from side-to-side and front-to-back. “Roll” is a particular problem for many post-war Rolls-Royce and Bentley motorcars, particularly for those used to modern vehicles. The Prestige Parts® Handling Kit features an anti-roll bar for the rear of the car (not fitted at the factory), which is fitted to alleviate lateral weight transfer from the front anti-roll bar. The kit also includes an uprated front anti-roll bar. Fitting a Prestige Parts® Handling Kit will significantly improve road holding and passenger comfort.
Please follow the instructions provided carefully.
Front Anti-Roll Bar
The front anti-roll bar is thicker than the original bar to reduce roll on cornering. The Prestige Parts kit is supplied with three uprated PU D-bushes* to accommodate the thicker bar. Re-use the original brackets.
Rear Anti-Roll Bar
The rear anti-roll bar is provided with fixing brackets (set of four), PU D-bushes (two), U-clamps (two), Securing Clamps for D-bushes (four), ball joints (two) and nuts, bolts and washers. No welding is required to fit the anti-roll bar.
a) The two axle plates are fitted as shown in Fig. 1.

* “PU” or Polyurethane bushes provide the same vibration absorption properties as rubber bushes, but are impervious to oil and light, and have a significantly longer service life.
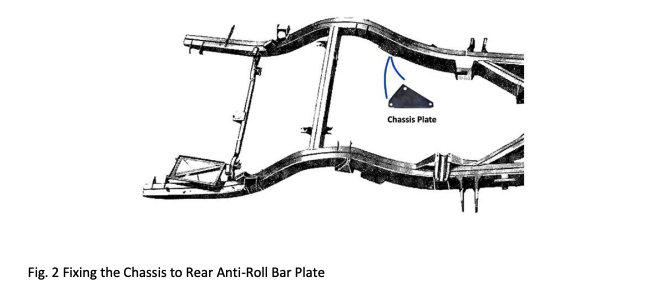
Re-fit the u-bolt nuts carefully, replacing the split pins. Split pins should be renewed. b) The chassis plates are fitted to the inside of the shock absorber mountings, as shown in Fig. 2.
c) Mount the ball joints onto the chassis plates and through the eye at each end of the anti-roll bar. Now secure the anti-roll bar to the axle plates using the two D-bushes, u-clamps and nuts, bolts and washers provided, as in Fig. 3. Leave the nuts, but leave loose to allow adjustment.
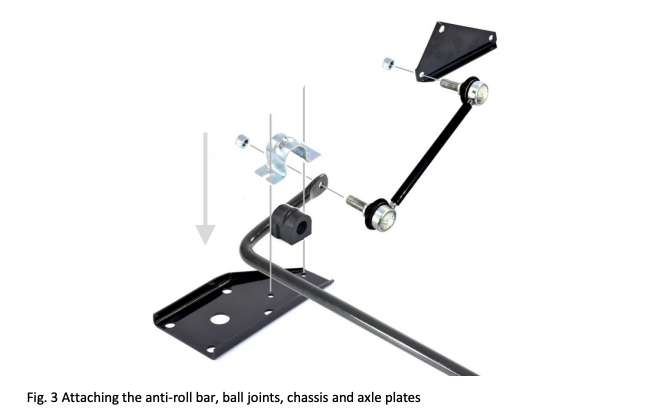
d) Centre the anti-roll bar and check lateral and vertical clearances, including the ball joints, before tightening the pivot fixings.
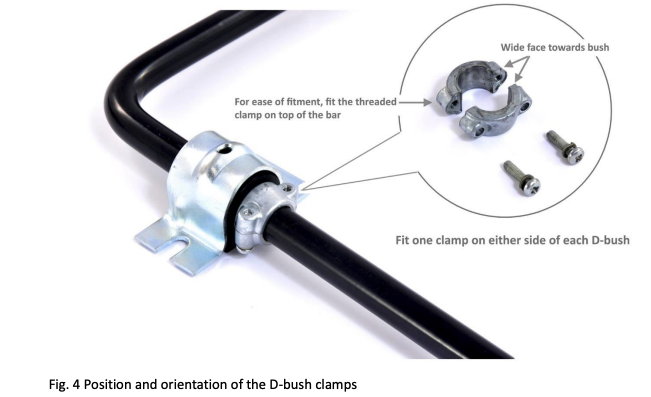
e) When you are happy with the position of the anti-roll bar, fit the four D-Bush clamps that are provided to prevent the bush moving sideways (see. Fig. 4)
If you have any questions, please do not hesitate to contact the vendor.