Fitting Instructions - Prestige Parts® Case Replacement UB39167CS
Fitting Instructions - Prestige Parts® Case Replacement UB39167CS
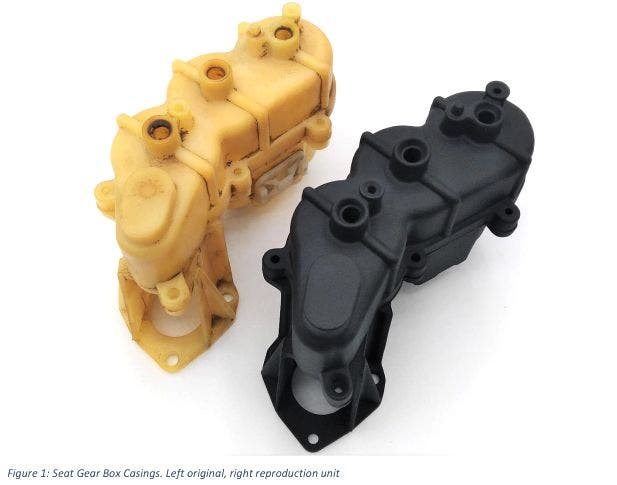
The seat gearbox is fitted beneath the front seats on Rolls-Royce and Bentley 4-door models from 1980-1986 (VIN 01001 to 16970), before the seat memory unit was introduced. The gearbox casing is prone to cracking, either through age, or because carpet or lambswool rugs get caught in the mechanism causing stresses to run through the gearbox. The casing supplied in the Prestige Parts® range has been manufactured from a superior, reinforced polymer for a long and trouble-free life.
This document describes on how to renew the seat gearbox casing, using the replacement case (see Figure 1). The casing supplied in the Prestige Parts® range has been manufactured from a superior, reinforced black polymer for a long and trouble-free life.
Preparation
Remove the seat gearbox casing from the car, then dismantle the internal components from the old seat gear box casing. Use a 7mm socket spanner for disassembly and reassembly. Refer to workshop manual TSD4400, Section S5, Sub-Section “Complete seat motor, gearbox, jack, fulcrum bracket assemblies – To dismantle” for further details.
Installation
The following seven steps will guide you through the assembly of the seat gearbox casing. To disassemble the old one, follow these steps in reverse order.
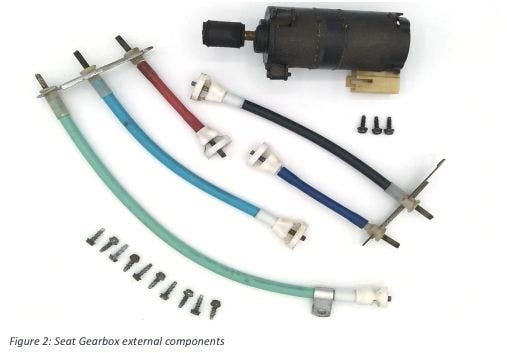
Step 1 - Make sure all the components, displayed in Figure 2 and Figure 3, are ready for assembly. Prepare some automotive grease as well and check the condition of the motor coupling UB33078 as usable. Renew if necessary.
Note that CD6092, the black drive gear (item located top centre in Figure 3), might deviate in colour and slightly in length. This will not affect its usability.
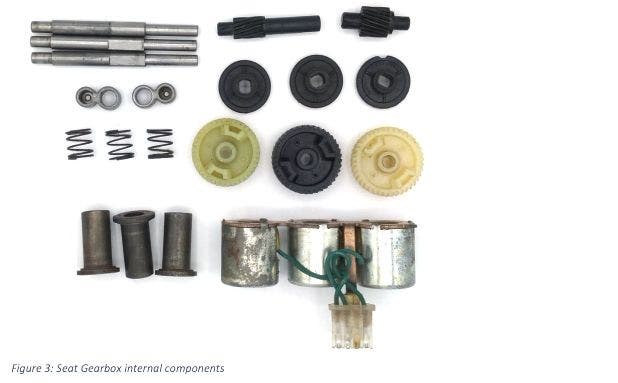
Step 2 - Prepare the solenoid block by inserting the three metal sleeves (seen bottom left in Figure 3 above) (Figure 4).
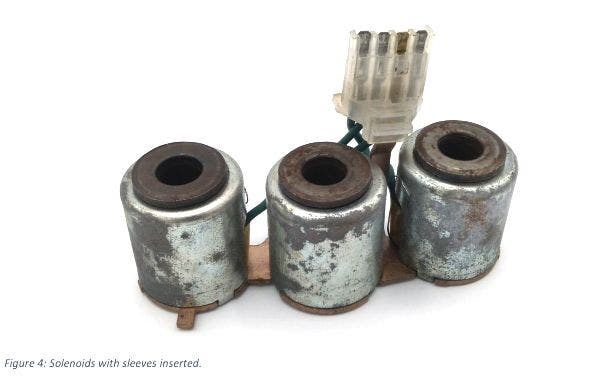
Turn the solenoids 90° and insert the three drive shafts and the plastic clutches, opposite to the flange of the metal sleeves, into them. The assembly will have a degree of play, as the components have a clearance fit. See Figure 5 for reference.

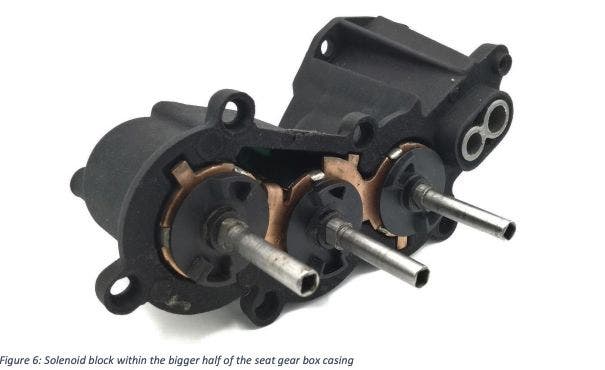
Step 3 - Carefully slip the solenoid block into the bigger half of the seat gearbox casing. Press in the figure-of-eight shape bushing seen at the right of Figure 6. This will later receive the idler CD6090 and drive gear CD6092. Adjust the length of the protruding drive shafts as shown in Figure 6.
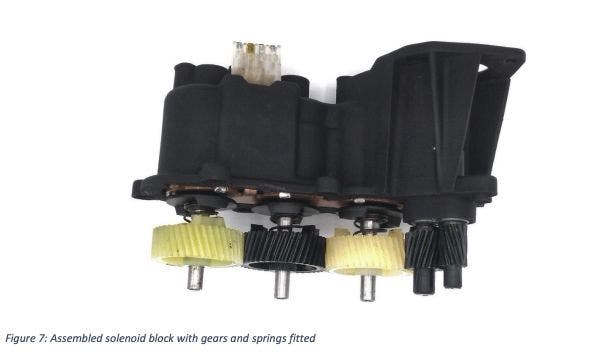
Step 4 - Assemble the gears and springs onto the drive shafts. Insert the drive gear (far right) before the idler gear (second right). Turn the gear to make sure there is no interference. Expect some friction while turning the gears.
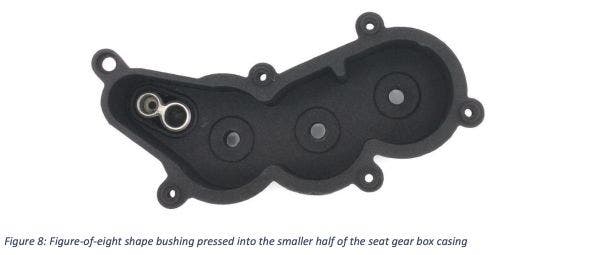
Step 5 - Insert the figure-of-eight shape bushing into the smaller half of the seat gear box casing as below. The bush is a light interference fit in the casing, so a degree of gentle force will be required to press it into place.
Step 6 - Bolt the assembled bigger and smaller half together, using the 7mm hex-shaped self-tapping screws of the old casing. Note the position of the drive shafts and adjust as necessary.
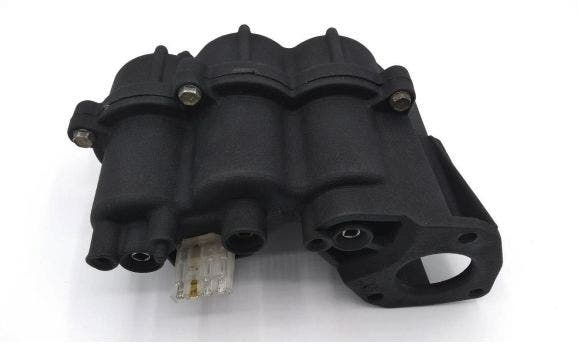
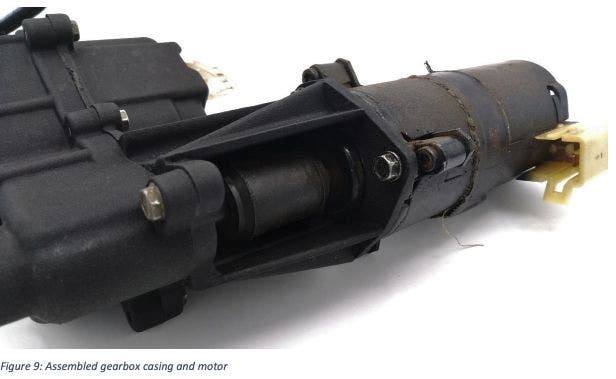
Step 7 - Align the coupling of the motor to the drive gear protruding from the casing. Attach the motor to the assembled seat gearbox casing (Figure 9).
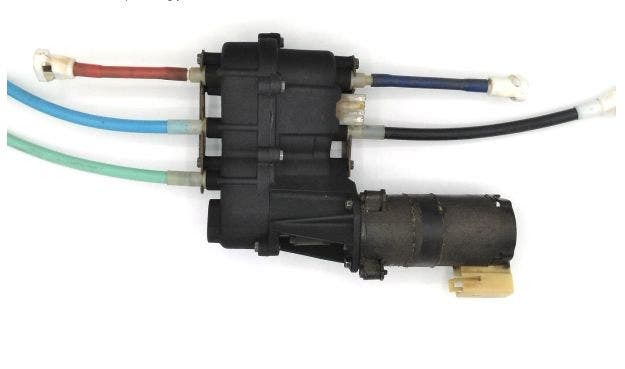
Step 8 - Attach the five cables and their bracket to the case. Install the assembled seat gearbox, motor & cables assembly back into the car. Reconnect wires to the solenoid block and motor. Lastly, fit the cables to the corresponding jacks within the seat motor mechanism.
Summary
Installation is finished – enjoy a fully functioning seat!
Contact
In case of further assistance is needed, either contact sales@introcar.com or the manufacturer Joschka Röben via joschka.roeben@jroeben.de. The workshop manual TSD4400 may be downloaded from here.