Today we are looking into the suspension components and issues with Rolls-Royce and Bentley models from 1967 onwards. In this video we have some suspension components from cars post Rolls-Royce Silver Cloud & Bentley S Type era so from the Rolls-Royce Silver Shadow onwards, which is around 1967. The Bentley S Types and Rolls-Royce Silver Clouds had suspension that pivoted on a threaded bushing bearing that works but it transmits vibrations through because it's metal on metal. So any vibrations that come up through the wheel, through the king pin, through the suspension arms and into the body of the car, it's all metal on metal so there is nothing to kind of dampen that vibration.
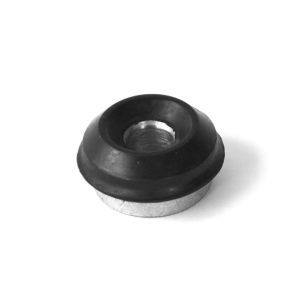
For the Silver Shadow they switched to rubberized pivots so on the early Silver Shadow the four suspension arms effectively were pivoted on the same type of pin, so this pin bolts on to the arm, I believe, or the sub frame, and then this goes through the arm and this rubber washer on the other side, and that is where it pivots. They are called bearing pins. In the early Rolls-Royce Silver Shadows these were at the top and the bottom front suspension arms. The rears are a bit different as they are on a trailing arm, which just has metalastic bushes similar to this, but the front suspension is a bit more complicated because of the steering.
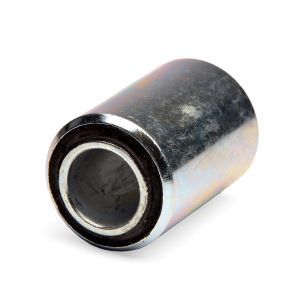
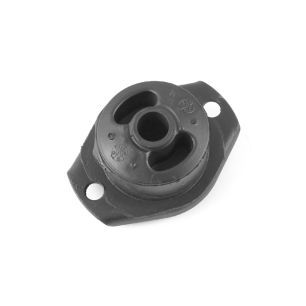
On the Silver Shadow the upper and lower levers, where they pivot off the inner, they have these bearing pins. Then they go to a compliant suspension and the compliant suspension still has the bearing pins on the lower levers but on the upper levers, you have one upper arm which is a very hefty upper arm and it joins the top of the sub frame on this bush. This is UR71238 (it's a Prestige Part) and this joins the sub frame through a bolt which is actually off center from it's head and it has an off center washer on the other end that locks in and to adjust the steering geometry, to adjust the camber, you undo the locknut and you turn that bolt and it pulls the upper arm in and out of the sub frame which adjusts the position of the top of the wheel, giving you your camber.
Sometimes we found that the springs can sag over time, the suspension springs can sag over time and make the car seat low and when the car is sitting low it affects the wheel geometries and then you can move this each way and you will never get them into spec until you correct the right height on the car.
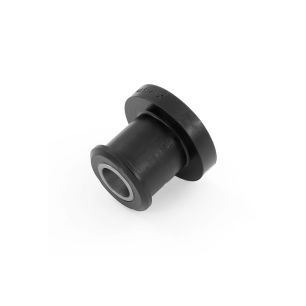
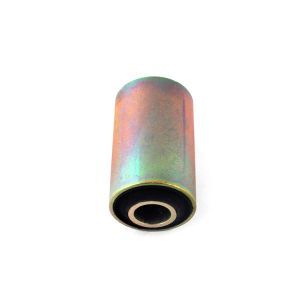
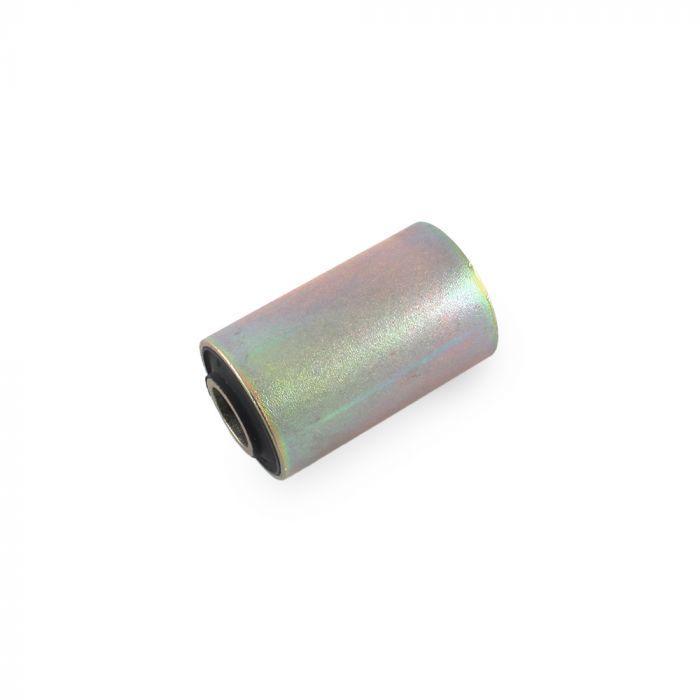
These bushes can collapse and then again you won't get your geometries right, you might find that your wheel is sitting a bit wonky, you might find that your tires are wearing out unevenly because the geometry is incorrect because this bush has collapsed. That is on the upper arm, that is the upper inner bush. The other important bush on the upper arms for the compliance suspension is this. This is the caster, sometimes called the outer compliant mount or the caster mount. This could also be the camber mount, whereas this is the caster mount so on that top arm it's got a bit of a dog leg to it and at the point where it bends you have got another rod which comes off the sub frame which is mounted through this bush. So you have got a big rod that runs through and there is a clevis that goes on to the upper arm and that goes through this bush which is UR15966. That is the genuine bush. The caster rod, again you can adjust the caster, which is the king pin inclination, for when the car hasn't got king pins, it's the caster which can also affect your tyre wear. These can collapse so quite often you will find these are a bit worn and you can see, especially when you jack the car up, and you've got a two poster ramp where the wheels are hanging free and you can get the suspension dropped down, you can see the rod trying to pull through this inner tube. So they are quite a common thing and you should check those on a service. On the lower arms they keep the bearing pins up until mid 1980's Spirits and Turbos. The Shadow starts off with four bearing pins then the upper arms go to the compliance suspension. The Silver Spirit and Bentley Turbo stick with the compliant suspension on the top and they redeveloped the lower suspension arms as well and they fit the SPM1534 which is similar to this but this pushes into the lower arms and the original ones have quite a tight fit and you need a puller to pull them through.
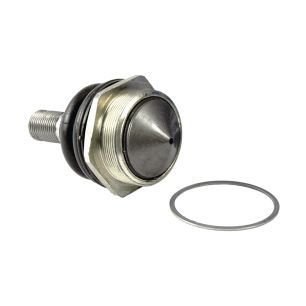
Now this is a poly one, this is a Prestige Parts version, high-quality polyurethane bush and the beauty of this is you can actually take the inner metal tube out, push this through and then slide the tube in; which means it's much easier to fit and you don't need a puller to pull that through so that's a good Prestige Parts product that we have got on the shelf. That's pretty much the inner suspension arms. When the Silver Shadow came out they moved away from king pins to ball joints, swivel pins on the suspension so what I have got here is the upper ball joint and I have got the lower ball joint and I have also got the damper ball joint.
When you have your MOT they will check the ball joints out and it's quite common that you will get a bit of play in these ball joints. Now the lower ball joint, you can see on the bottom, the ball joint, you can see on the bottom, the two nylon cups that house the ball. This pin has got a ball on the end and it's housed in this housing with two nylon cups, you can see this washer, this is actually a shim and that screws into a housing and depending on how many shims you have in there will determine the amount of pressure on that nylon cup. So when you set these up, you have to actually make sure that you have got the correct shims in there. So the idea is that you put it together and tweak it, not completely tight, feel the pin & see if it's loose, then you have to take it out, take a shim out, put it back in until you get the right tension. That is the same on the damper ball joint. You can see the nylon cups, you have to set the tension on these ball joints when you fit them. With the upper ball joint, we do a complete assembly, you can see that the tension has already been set and the screw that sets the tension here, or the nut, is already peened over, so it's locked in place. This is actually just pressed into the upper arm, it's got these splines so it can't turn but it is pressed in and then there is a castellated lock nut that goes over the top of this, which there is a special tool for, which you should use but if you don't have it you can get away with using Stillsons grips, and undo it that way. The idea is that with the upper arm, you take the eccentric bolt off the inner compliant mount; you undo the caster rod off the upper arm; you break the ball joint; so you undo the split pin; take the nut off; hit it with a hammer and drop the ball joint and then the upper arm is free; take that to a press; undo the castellated nut; press it out and press the new one and put it back together and do your wheel geometries.
That's pretty much it for the suspension on these cars! That suspension is designed to stay the same then up until the Arnage and Seraph came out in 1997 and you will find this same design on the late Azure and Continental T and everything up until 2002. If there are any questions please feel free to comment below and we will try and answer them for you!

.jpg)